前置
- 票据打印机(支持 ESC/POS 指令),需要内置蜂鸣器
- 打印机连接到电脑
- Windows 11 系统
- 使用 zadig 修改默认驱动。为什么要改默认驱动?看这里
- 需要提前了解 usb 的
vendor id、product id、config、endpoint、interface number - 需要提前了解 usb 通信过程。

框图
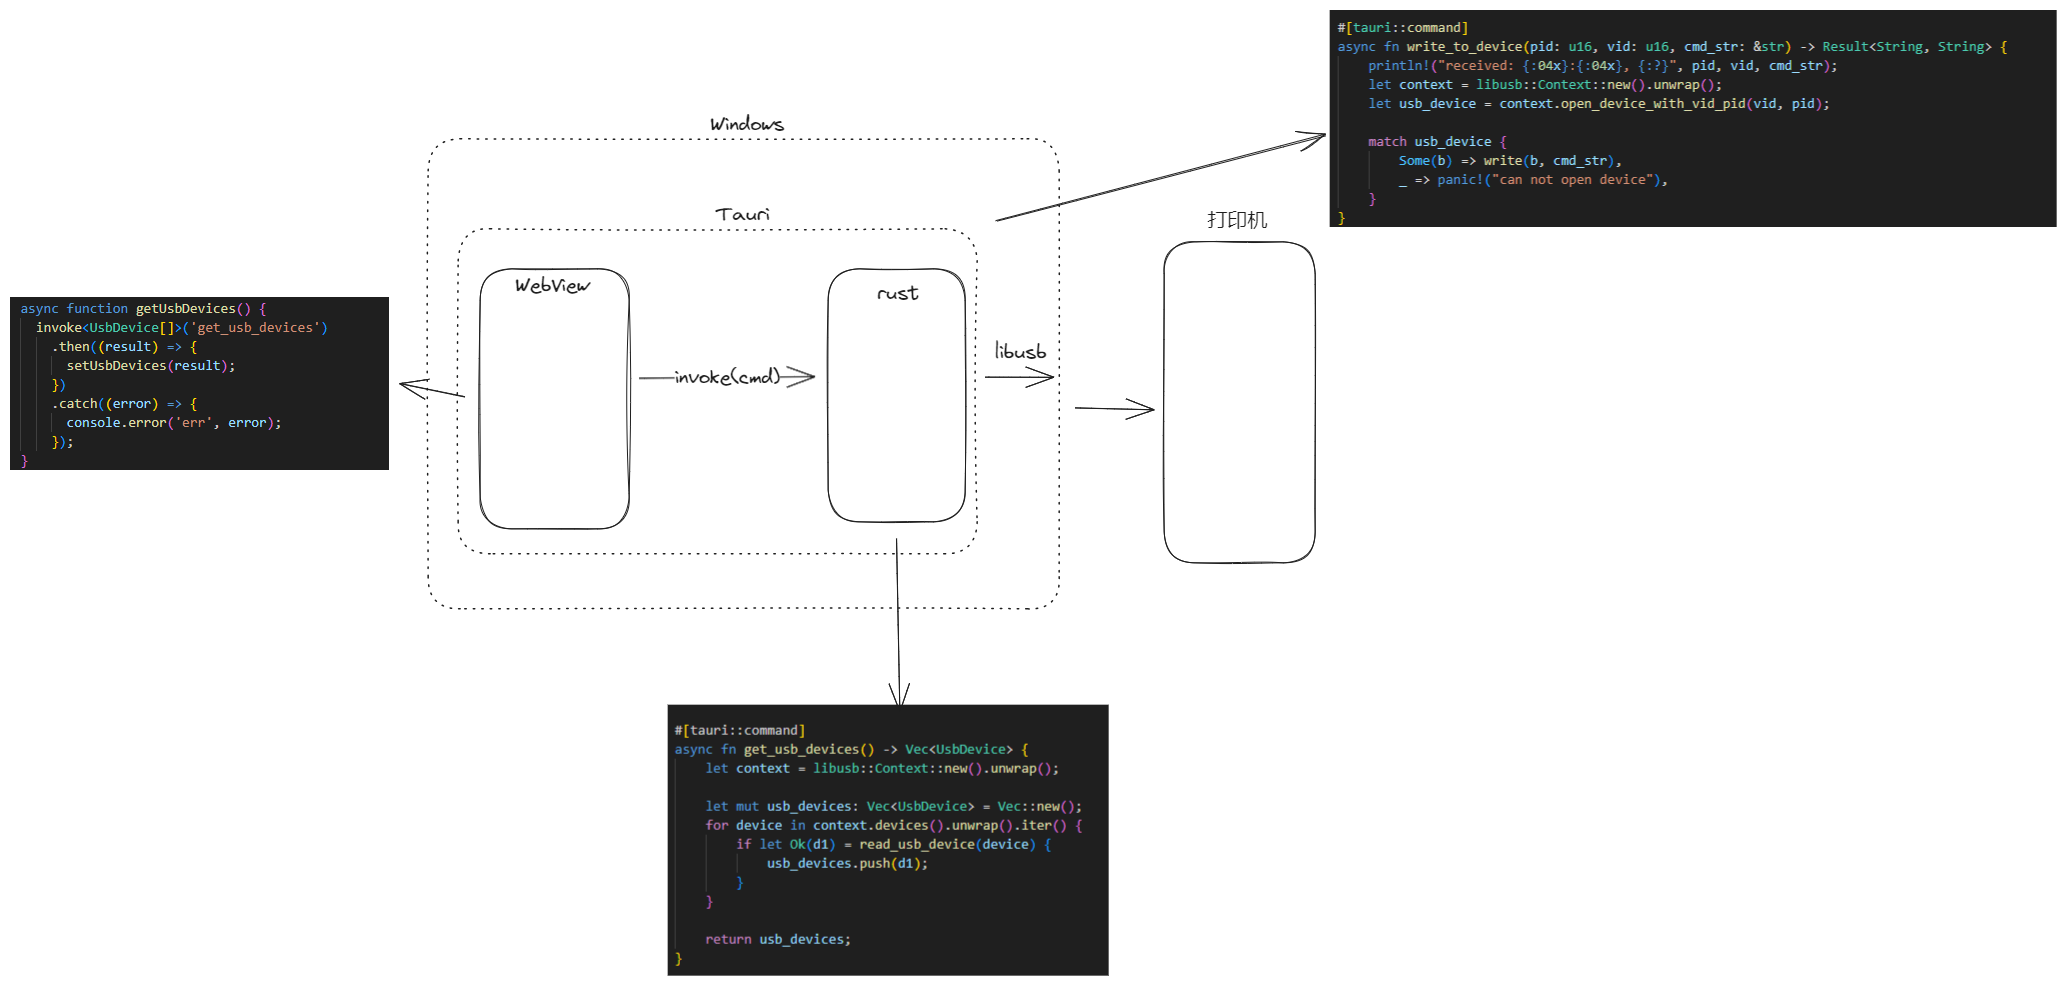
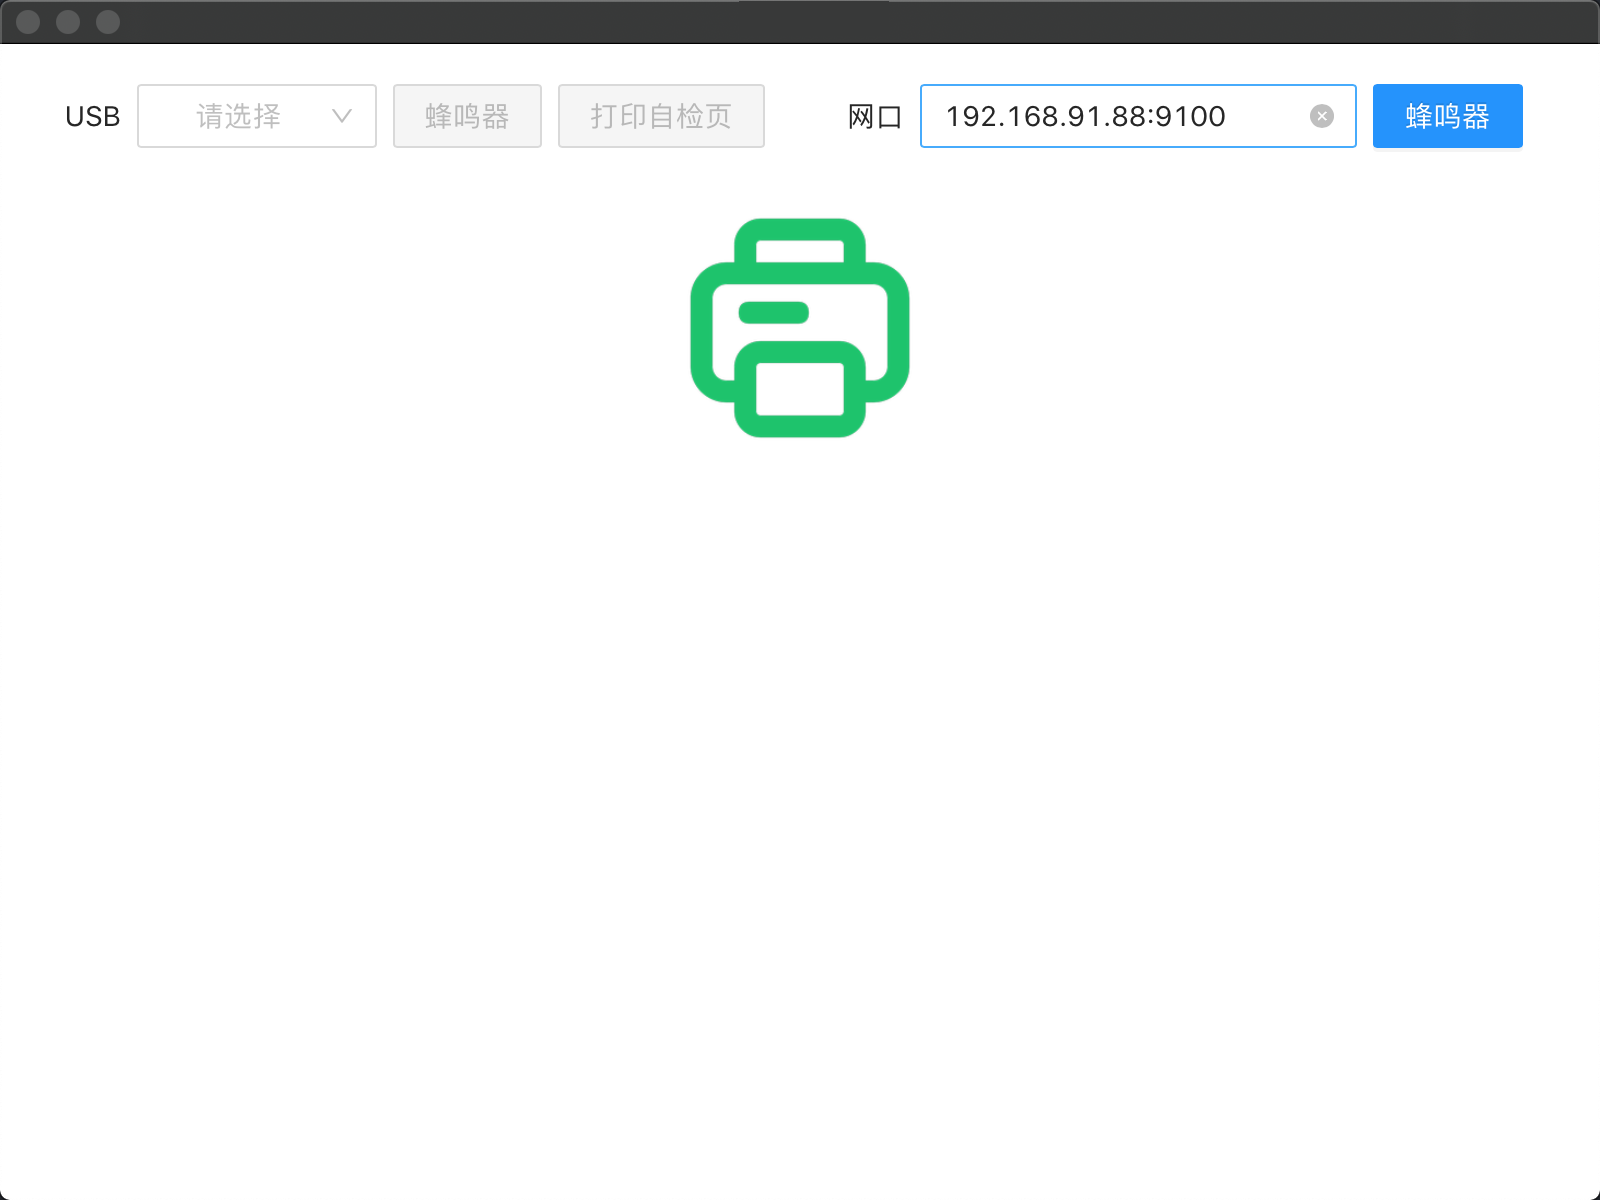
UI
流程
- 前端页面加载完毕后,请求获取 usb 设备列表。
useEffect(() => {
  getUsbDevices();
}, []);

async function getUsbDevices() {
  invoke<UsbDevice[]>("get_usb_devices")
    .then((result) => {
      setUsbDevices(result);
    })
    .catch((error) => {
      console.error("get usb list err", error);
    });
}- 后端(Rust 端)初始化 usb 上下文并获取 usb 设备列表,然后根据
vendor_id过滤出我们需要的 usb 列表,然后将 usb 设备的vendor_id,product_id,manufacturer_name,product_name等信息以 json 格式返回给前端。
#[tauri::command]
async fn get_usb_devices() -> Vec<UsbDevice> {
    let context = libusb::Context::new().unwrap();
    let mut usb_devices: Vec<UsbDevice> = Vec::new();
    for device in context.devices().unwrap().iter() {
        if let Ok(d1) = read_usb_device(device) {
            usb_devices.push(d1);
        }
    }
    return usb_devices;
}

fn read_usb_device(device: Device) -> Result<UsbDevice, String> {
    let device_desc = device.device_descriptor().unwrap();

    // 根据 vendor_id 过滤
    if device_desc.vendor_id() != 0x1FC9 {
        return Err("not valid printer".into());
    }
    // 构造返回给前端的 usb device 信息
    let mut usb_device = UsbDevice {
        bus_number: device.bus_number(),
        address: device.address(),
        vendor_id: device_desc.vendor_id(),
        product_id: device_desc.product_id(),
        manufacturer_name: Some(String::from("unknow manufacturer name")),
        product_name: Some(String::from("unknow product name")),
        serial_number: Some(String::from("unknow serial number")),
    };

    // 为了获取 usb 设备名称,或许有更好的方式获取,如果你知道,请记得给我留言。
    match device.open() {
        Ok(handle) => {
            let timeout = Duration::from_secs(60);
            if let Ok(languages) = handle.read_languages(timeout) {
                if languages.len() > 0 {
                    let language = languages[0];
                    usb_device.manufacturer_name = handle
                        .read_manufacturer_string(language, &device_desc, timeout)
                        .ok();
                    usb_device.product_name = handle
                        .read_product_string(language, &device_desc, timeout)
                        .ok();
                    usb_device.serial_number = handle
                        .read_serial_number_string(language, &device_desc, timeout)
                        .ok();
                }
            }
        }
        Err(e) => {
            println!("can not open device: {:?}", e);
            // return Err("can not open device".into());
        }
    }

    return Ok(usb_device);
}- 用户从 usb 设备列表下拉框中选中一个 usb 设备,点击“蜂鸣器”,此时前端会把
vendor_id,product_id和使蜂鸣器响的指令(以“27, 66, 2, 2”字符串的形式)这是ESC/POS指令,传给后端。
const handleUsbBeep = async () => {
  const { vendor_id: vid, product_id: pid } = usbDevice || {};
  try {
    const cmd = [27, 66, 2, 2].join(",");
    await invoke<string>("write_to_device", { pid, vid, cmdStr: cmd });
  } catch (err: any) {
    message.error(err);
  }
};- 后端根据接收到
vendor_id和product_id打开设备,然后设置激活的配置(调用DeviceHandle 上的set_active_configuration(1))和声明接口(调用 DeviceHandle 上的claim_interface(0))1 和 0,我这里是写死的,不同的 usb 设备,这两个值或许会不一样。
#[tauri::command]
async fn write_to_device(pid: u16, vid: u16, cmd_str: &str) -> Result<String, String> {
    println!("received: {:04x}:{:04x}, {:?}", pid, vid, cmd_str);
    let context = libusb::Context::new().unwrap();
    let usb_device = context.open_device_with_vid_pid(vid, pid);

    match usb_device {
        Some(b) => write(b, cmd_str),
        _ => panic!("can not open device"),
    }
}- 转换字符串命令为
Vec<u8>形式,然后通过write_bulk(endpoint, buf, timeout)方法发送到 usb 设备。注意endpoint我的这里写死的是3,这个要根据 usb 设备来变。
fn str2u8(value: &str) -> u8 {
    if let Ok(v) = value.parse() {
        return v;
    } else {
        return 0;
    }
}

fn write(mut dh: DeviceHandle, cmd: &str) -> Result<String, String> {
    dh.set_active_configuration(1).unwrap();
    if let Err(e) = dh.claim_interface(0) {
        println!("{}", e);
        return Err(e.to_string());
    } else {
        // 字符串转 Vec<u8>
        let arr: Vec<&str> = cmd.split(",").collect();
        let arr1: Vec<u8> = arr.iter().map(|value| str2u8(value)).collect();
        if let Err(b) = dh.write_bulk(3, &arr1[..], Duration::new(60, 0)) {
            println!("{}", b);
            return Err(b.to_string());
        } else {
            return Ok("执行成功".into());
        }
    }
}
遇到的问题
- 一开始我是基于
antd@5来做的,后来回家用 macOS 打包了,发现运行不起来,后来就把antd的版本降到4。 - 家里没有打印机,无法测试 macOS 版本的 app 是否正常。
- 打包后,把安装包放到虚拟机里,发现缺少了
libusb dll而导致程序无法正常运行,把libusb-1.0.dll拷贝到安装目录下就能正常运行。 - 打包后,把安装包放到虚拟机(Windows 7)里运行,第一打开,由于系统没有安装 WebView2 运行时,安装程序会自动下载 WebView2 运行时。
- Windows
wix打包无法把libusb-1.0.dll打包进安装包,这个问题到现在也不知道怎样解决,如果你知道,请给我留言。 - Windows
nsis打包无法把Webviewloader.dll打包进安装包导致安装后无法运行。
2024-08-12 更新:
对#3 #5 问题,改一下默认的编译工具链就行。
1、列出本机编译工具链工具。rustup toolchain list
$ rustup toolchain list
stable-x86_64-pc-windows-gnu
stable-x86_64-pc-windows-msvc (default)
如果默认的编译链工具不是 stable-x86_64-pc-windows-msvc,需要改为默认
2、设置默认编译工具链
rustup default stable-msvc